I. Why Use LightPDF for Object Removal?
II. How to Remove Objects from an Image Using LightPDF?
III. Tips and Best Practices
IV. Troubleshooting Common Issues
V. Conclusion
I. Why Use LightPDF for Object Removal?
LightPDF’s AI object removal feature is a revolutionary tool in photo editing. Its AI photo editor remove object capability is ideal for anyone looking to improve their images without requiring advanced editing skills. Here’s why you should consider trying it out:
- Speed and Precision: LightPDF’s AI swiftly identifies and eliminates unwanted elements, ensuring your image retains a natural look.
- Easy-to-Use Interface: There are no complicated tools or steep learning curves just a simple and straightforward process.
- Free Access: Take advantage of high-quality AI image object removal at no cost.
Whether you want to eliminate an object from a photo or completely remove a distraction from an image, LightPDF provides a dependable solution.
II. How to Remove Objects from an Image Using LightPDF?
Follow this step-by-step guide to learn how to remove objects from your photos using LightPDF:
Step 1: Access LightPDF’s AI Photo Editor
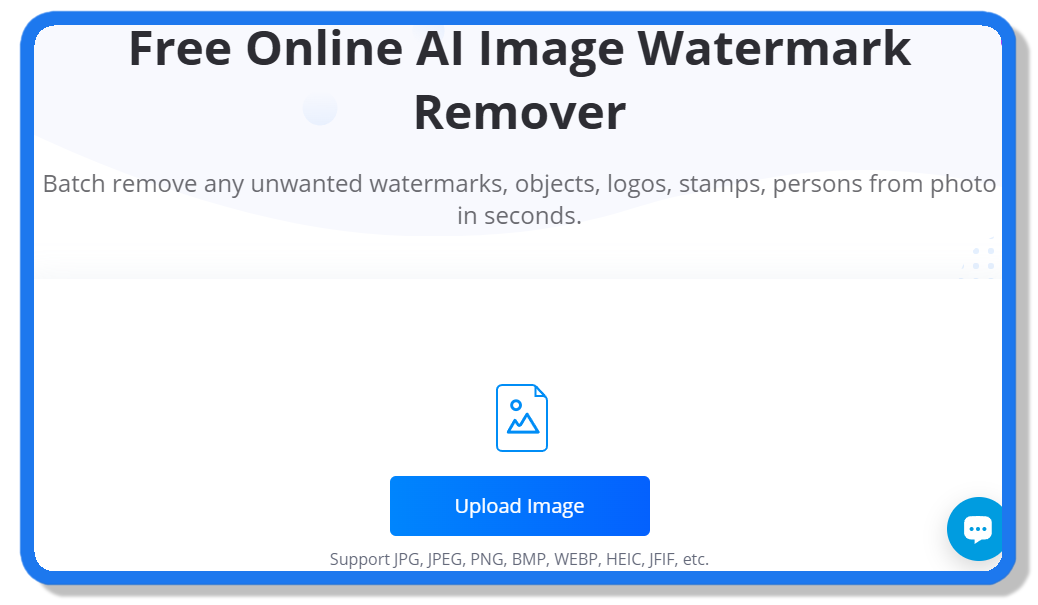
Start by visiting the LightPDF website. On the homepage, navigate through the AI tools section and look for AI image watermark remover.

Step 2: Upload Your Image
Once you’re in the editor, click the “Upload” button to select the photo you want to edit. For the best results, choose high-resolution images. LightPDF supports various file formats, ensuring a smooth editing process regardless of your image type.
Step 3: Select the Object to Be Removed
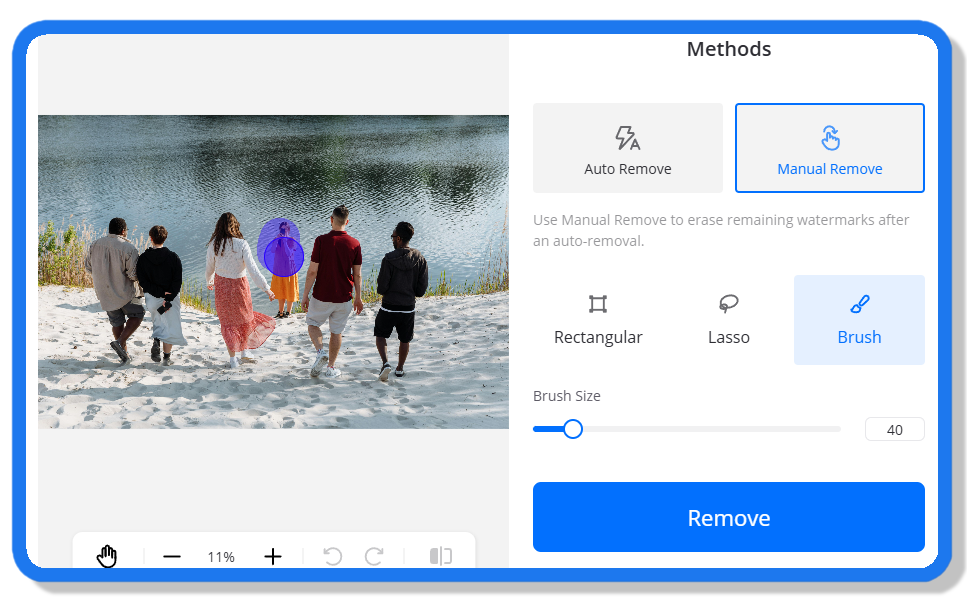
Now to specifically remove object from photo, all you need to do is to click “Manual Remove”. Using the mark down tools provided, you can then start marking the unwanted object that you wish to be deleted. Make sure to mark the unwanted objects only to avoid messing up the other parts of the picture.

Step 4: Initiate the AI Process
After marking the unwanted object, click “Remove” to initiate the AI process. The advanced algorithm will then work to eliminate the marked object, seamlessly blending the surrounding area for a natural appearance. This is the essence of the AI object removal process that distinguishes LightPDF from the rest.
Step 5: Save and Download Your Edited Image
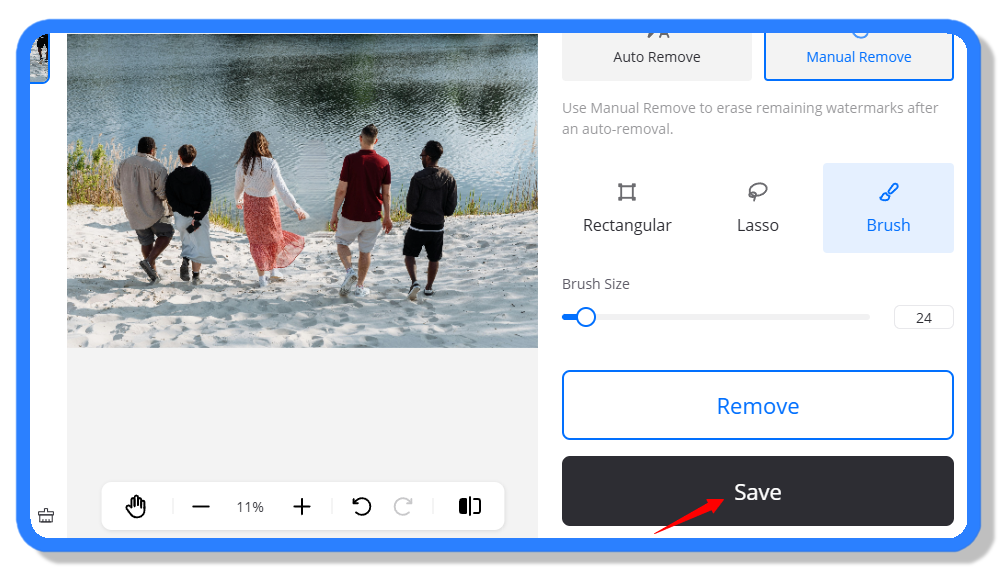
After you remove object from image, you can now save your work by clicking the “Save” button. The final image, now free from unwanted distractions, is ready to be shared or printed all in just a few minutes.

III. Tips and Best Practices
Maximize your editing success with these helpful tips:
- Before Editing:
Ensure your photo is of high quality with good lighting. This allows the AI to detect and remove objects more accurately. - During Editing:
Zoom in to precisely mark the object you wish to remove. A more accurate selection leads to better results. - After Editing:
Compare the original image with the edited version. This helps you determine if further adjustments are necessary.
By following these practices, you’ll achieve flawless results every time, making LightPDF’s AI image object removal tool an indispensable part of your photo editing toolkit.
IV. Troubleshooting Common Issues
Even with powerful tools, you might encounter a few bumps along the way. Here are some common issues and their solutions:
- Incomplete Removal:
If the object isn’t completely removed, try reselecting the area and reapply the tool. Sometimes a more precise selection can help the AI process the image better. - Artifacts or Blurring:
Occasional artifacts might appear after object removal. Use the refine tool to smooth out these areas. Adjusting the brightness or contrast might also help blend the edges more naturally. - Slow Processing:
Large images or a heavy workload might slow down the process. Consider resizing your image or ensuring you have a stable internet connection for optimal performance.
Remember, practice makes perfect. The more you use the tool, the better you’ll become at achieving the ideal balance between automated processing and manual refinement.
V. Conclusion
LightPDF’s AI Object Remover is changing the game for photo editing. Thanks to its user friendly AI photo editor that allows you to remove objects, even beginners can create stunning results. By following our straightforward guide, you can effortlessly eliminate unwanted elements from your photos and turn your images into flawless masterpieces.


Leave a Comment