


LightPDF provides a quick sign feature, and supports adding digital and handwritten signatures to PDF documents. You can create a signature by importing a signature image or drawing your own signature. If you want to know the detailed steps, please read the following tutorial.
Digital Signature

Important documents such as contracts, orders, bank records, and customs declaration materials often require the signatures of multiple departments. Using LightPDF to edit and sign PDFs not only protects the documents, but also speeds up the signature process and improves office efficiency.
- Open a PDF document.
- Click Sign > Digital signatures > Drag new signature rectangle.
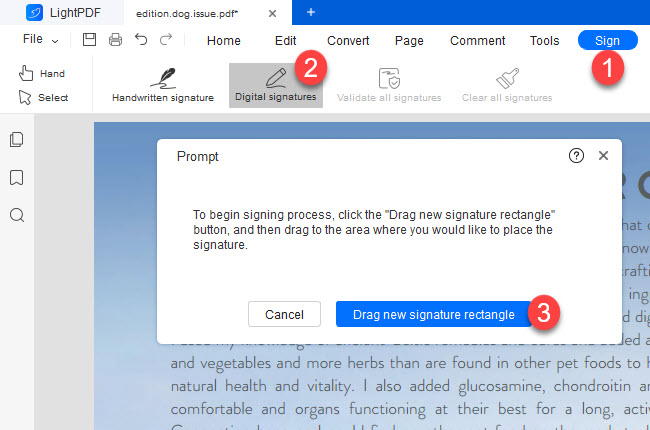
- Right click to select the signature area.

- The Signature list window pops up, this pop-up window has many detailed options, please be patient and check the following steps.
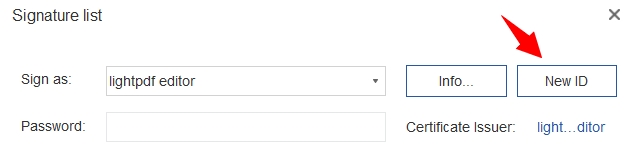
- Select New ID to create your ID signature.
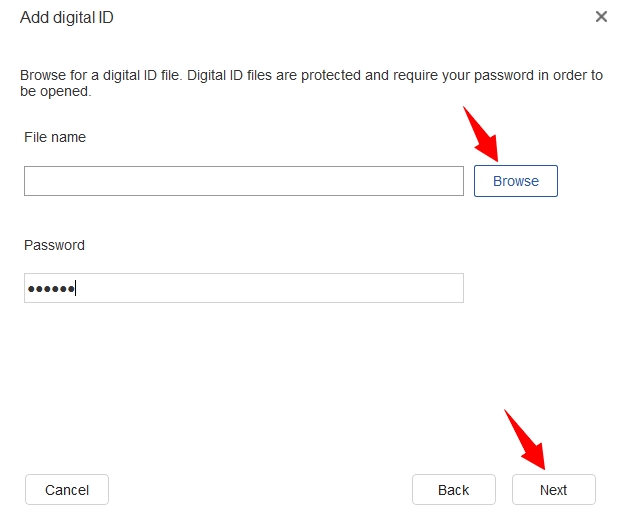
- If you want to import the digital ID file saved in local, select My existing digital ID from a file > Next > click Browse to import the digital ID file, if the ID file is set with a password, you need to enter the password.
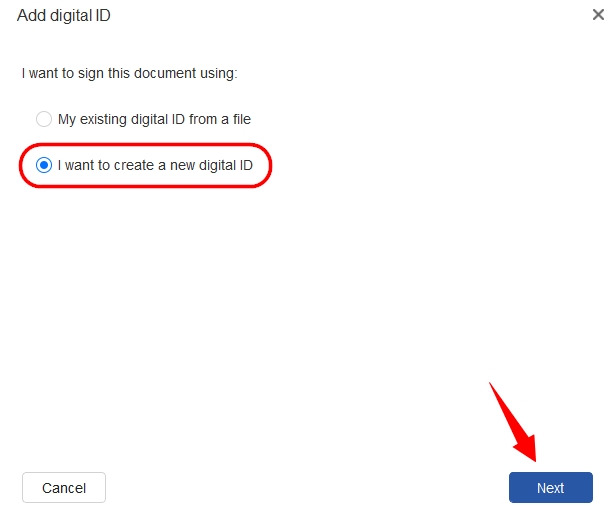
- If you want to create a new ID, please check I wish to create a new digital ID > Next.
- According to your needs, choose the way you want to store the digital ID, and click Next.

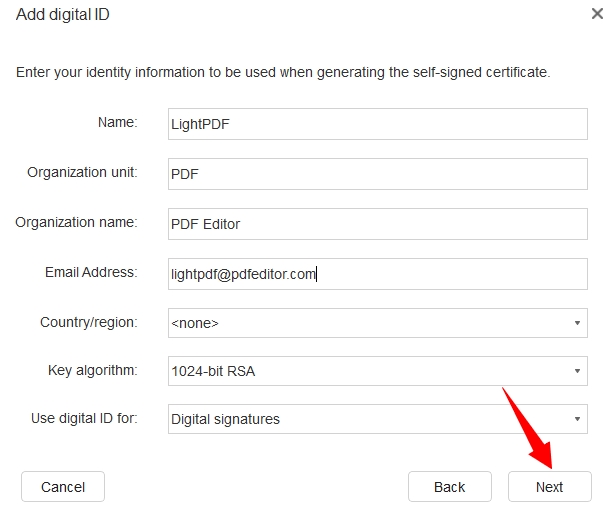
- Pop up the information setting window, please enter your signature information.Name: Required;Organization unit: Optional;Organization name: Optional;
Email Address: Required;
Country/region: Optional, fill in according to needs;
Key algorithm: the higher the number of bits, the more difficult it is to decipher;
Use digital ID for: If you choose Digital signatures, the document will be encrypted, which can prove the source of the document and ensure that the information of the document has not been tampered with during transmission. Data encryption is to encrypt the data of the PDF, only those who have the certificate can browse the PDF or other editing.
- After filling in the information, please click Next to save the digital ID > Click Browse to select the storage location of the new digital ID and set the password (required).
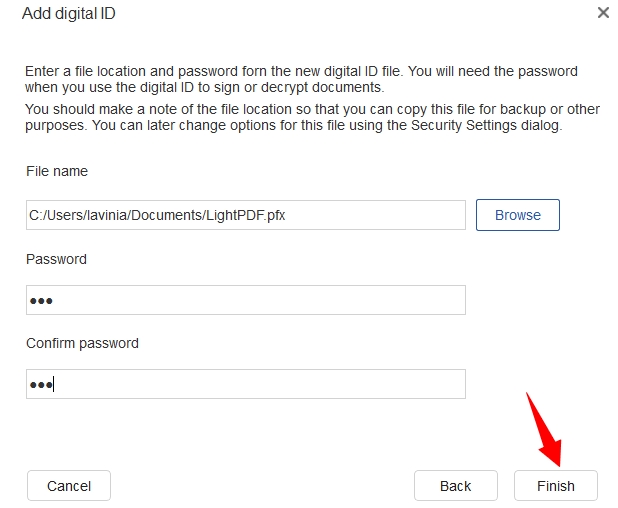
- Then click Finish, the digital ID will be saved to the local folder, and at the same time, it will also be automatically saved in LightPDF.

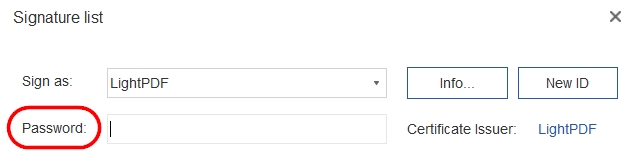
- When the digital ID is used to sign a document again, the password is required. And when you want to clear the digital signature to decrypt the document, you also need to enter the password.
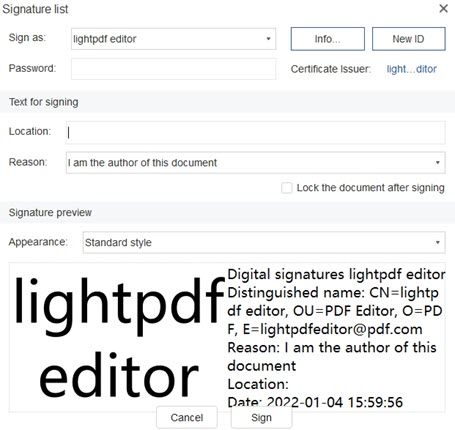
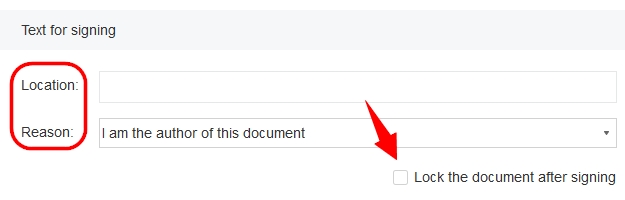
- Next is to fill in the Text for Signing:Location: Optional; If you don’t want to show it in the signature, you can refer to the next step to remove the location;Reason: Optional: You can also refer to the next step to remove the reason;Encrypt document after signing: If you select this option, the PDF document cannot be modified in any way after the digital signature is applied;
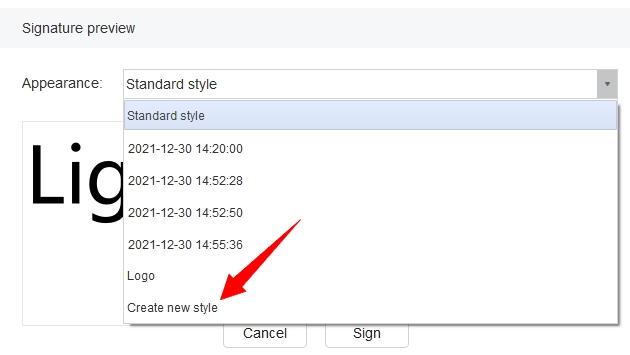
- The last is to confirm the signature appearance: you can preview your signature in advance, if you are not satisfied with the standard style, you can select Create new style > the configure signature style window will pop up;
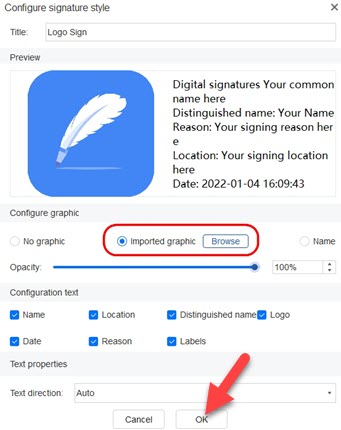
 Title: Optional; the signature style you create will be saved in the style column. If you don’t fill in the title, the style will be named automatically with the date when it was created;Configure graphic: You can choose to import your seal, logo, etc. for style;
Configuration text: Tick to add new elements to your signature, such as date, reason, labels, etc., if you remove the ticks, the element will not be showed in your signature;
Text properties: Configure the text direction.
Tip: You can preview your new signature style in the preview box in real-time, click OK to save the new style.
- After the signature information is configured, please click Sign, the signed file will be saved as a new PDF document, and the new document will be automatically opened in LightPDF. After adding a digital signature, the document will be encrypted and the contents cannot be edited.

- Clear signature: If you want to remove the digital signature, right-click on the signature and select Clear signature. If you are not the author of the signature, you need to enter the password of the signature to clear it; After the signature is cleared, the document will be decrypted and contents can be edited again.

- Signature properties: Right-click the signature and select Signature properties to show the signature author’s email, signature time and other information; you can also double-click the digital signature to view the properties.


 Title: Optional; the signature style you create will be saved in the style column. If you don’t fill in the title, the style will be named automatically with the date when it was created;Configure graphic: You can choose to import your seal, logo, etc. for style;


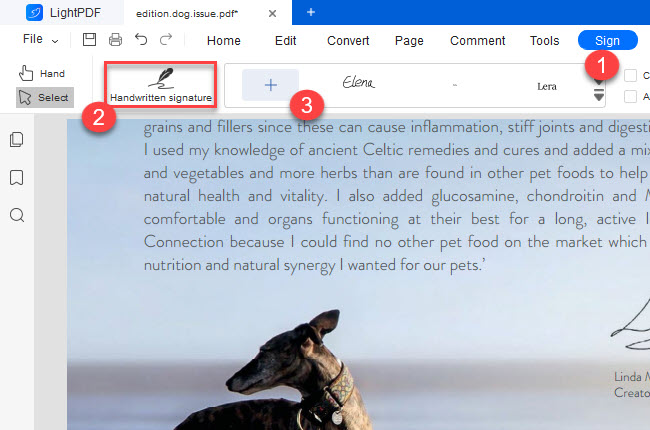
Handwritten Signature
- Click Sign > select Handwritten signature > click + to enter a handwritten signature.
- You can create a handwritten signature by directly drawing a signature, importing a local signature file and typying a signature.
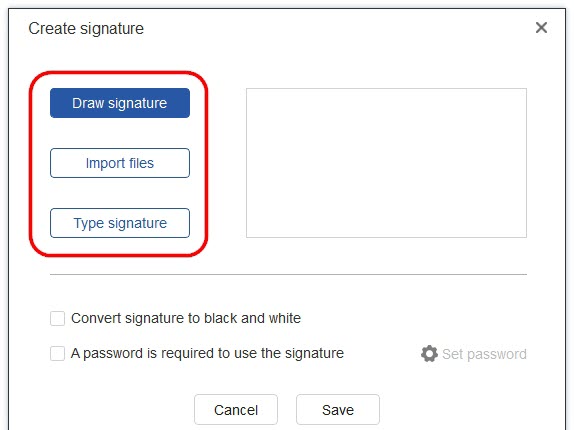 Draw signature: Use the mouse to draw the signature directly in the handwriting box, and after clicking OK, you can drag it to place the signature where you want.
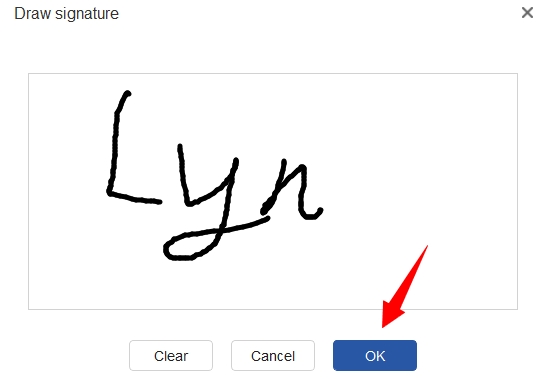
Import files: Browse and import the local signature image, click OK, and then drag it to place the signature where you want.
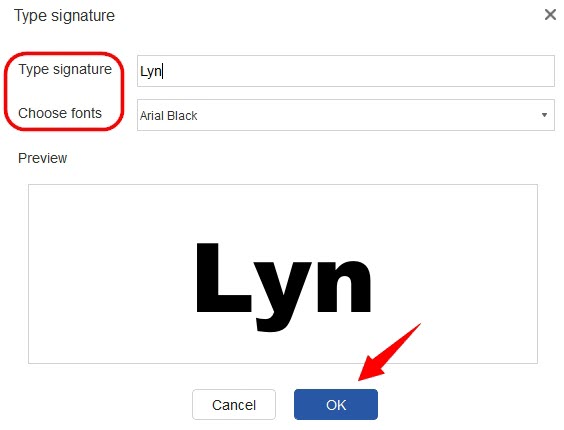
Type signature: You can type in your name here.
Choose fonts: Choose the font that you want > click OK to save to the document.
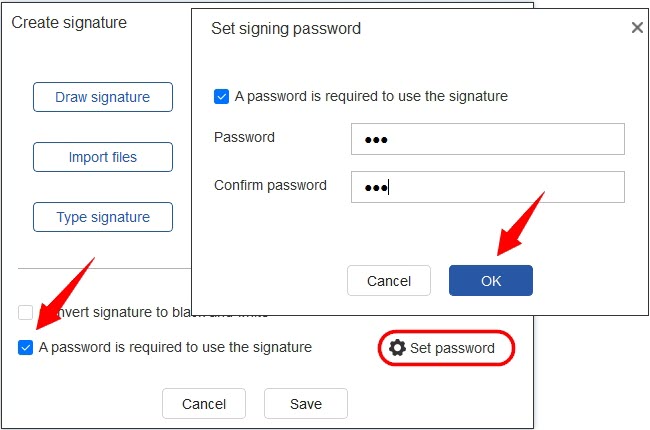
- For the above three handwritten signature methods, you can choose whether to set a signature password. After setting the password, when you use the signature, you need to enter the password.
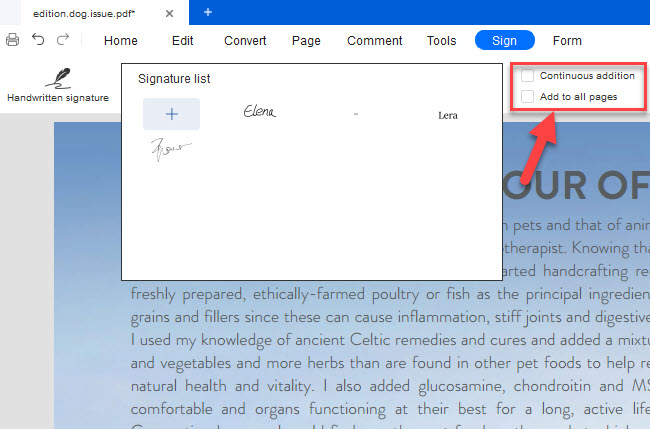
- All handwritten signatures created successfully can be saved to LightPDF for repeated use, and you can also tick Continuous addition and Add to all pages to save your signing time.
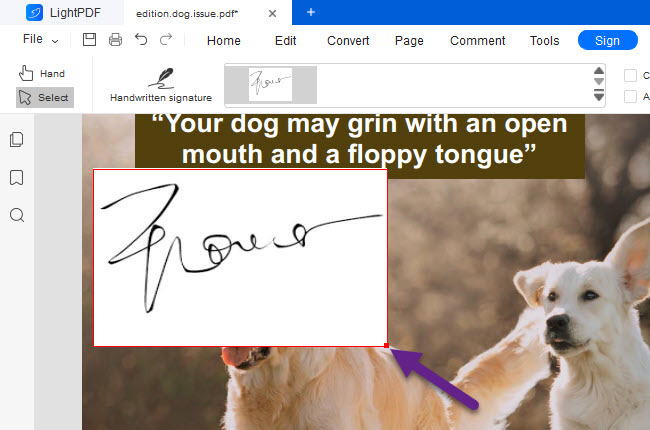
- Drag and drop the handwritten signature into the PDF document, and you can adjust the size and position of the handwritten signature according to your needs.
- Then right-click and choose Apply the signatures, you can add multiple signatures, after editing all of them, right-click and select Apply all signatures to apply all handwritten signatures at once.

- Delete the handwritten signature: After the signature is applied, the signature can no longer be changed, edited or deleted.
- Tip: Adding a handwritten signature has no effect on editing and other document permissions.

 Draw signature: Use the mouse to draw the signature directly in the handwriting box, and after clicking OK, you can drag it to place the signature where you want.


If you encounter any problems in the process of using LightPDF, please feel free to contact us.
Leave a Comment