What is the Importance of Sign Timestamping?
When it comes to digital signatures, adding timestamps to your signatures can be a great help in managing documents, especially in the business world. It helps to validate the time and date that you have signed your PDF documents. Additionally, it can be used for file management as the files can be timestamped in chronological order and unalterable. Adding PDF timestamps can be useful for electronic invoicing, digital commerce, accounting, and many more.
How to Sign Timestamp on PDF?
LightPDF Editor
LightPDF Editor is a full-featured program that you can use to manage your PDF tasks such as editing, converting, annotating, etc. It also lets you create a digital signature with a timestamp to help you certify or validate essential documents. On top of that, this solution ensures that your files are safe and secured by encrypting a password.
Follow the detailed guide to add PDF timestamp with LightPDF:
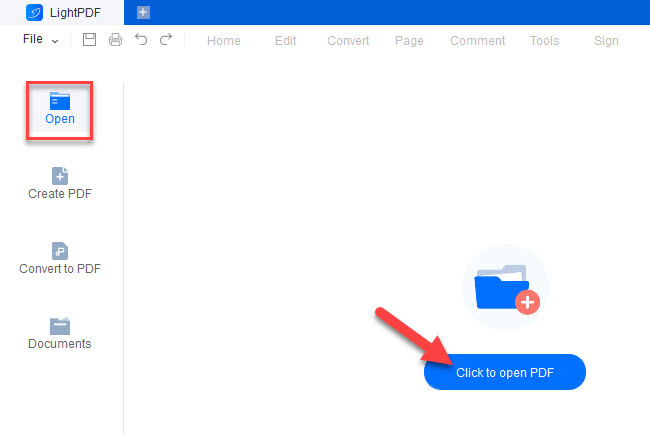
- Open a document that you want to sign timestamp with LightPDF Editor. You can also use the existing document that is stored in the program.
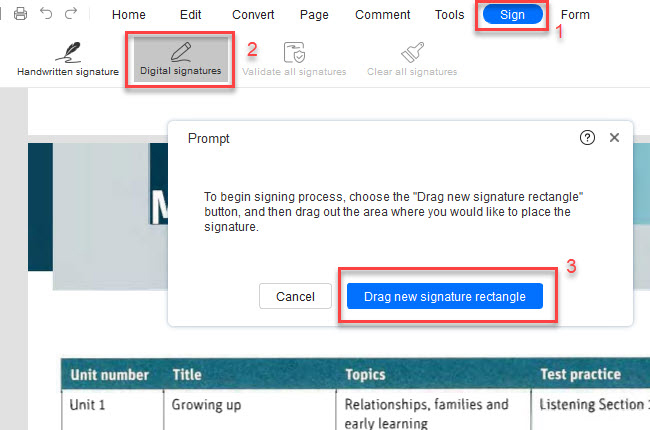
- Next, visit the Sign panel on the upper part of the software’s interface. Select the Digital Signature option > click the Draw new signature rectangle button on the dialog box. This will enable you to drag a box on the part of the document where you wish to create the signature with a timestamp.
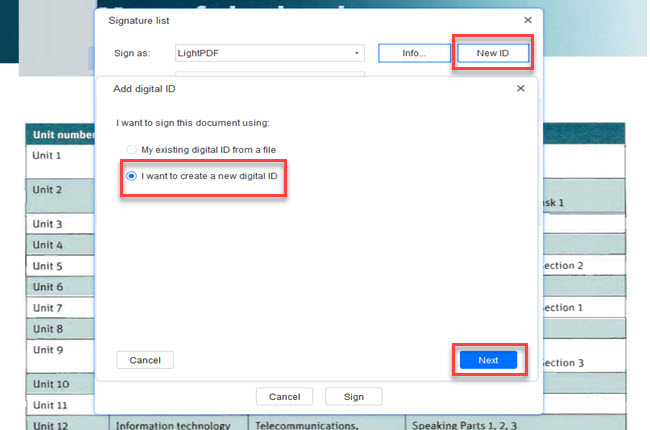
- Another pop-up window will show on the screen, click New ID > I want to create a new digital ID> Next.
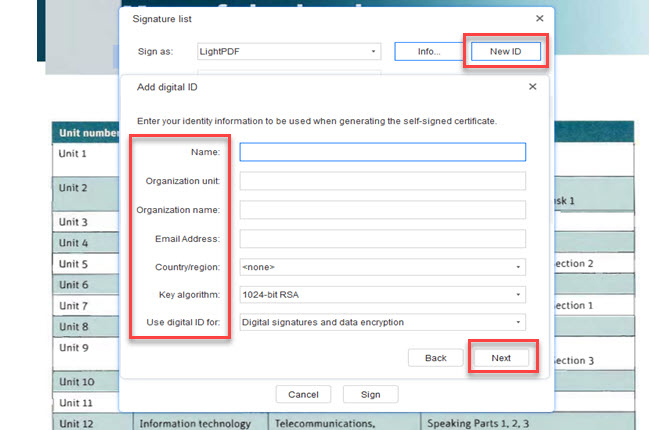
- Fill in the information needed, especially the Name and Email Address. After this please click the Next button again.
- The next page will let you configure your Password>Confirm password> Finish
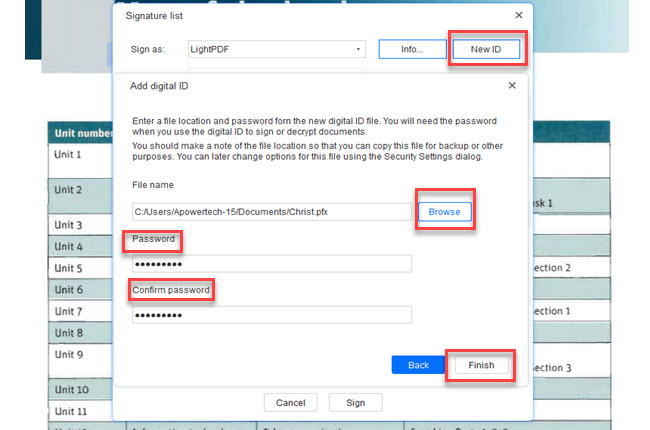
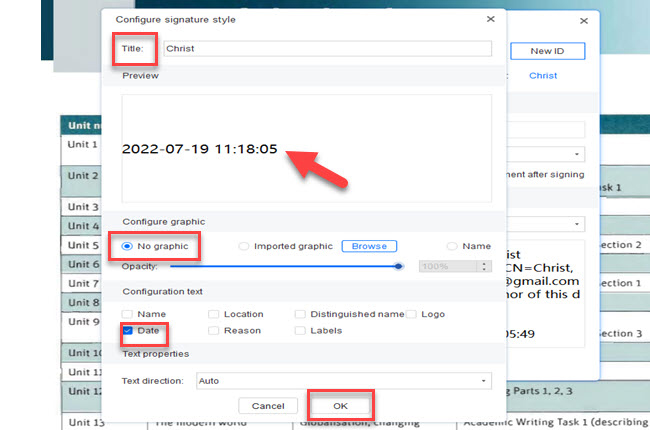
- Under Signature preview, drop down the Appearance menu and choose the Create new style. This prompt will let you configure your new signature style. Set the Title of your signature and click the No graphic option under Configure graphic. Then, under the Configuration text menu, select Date option and hit OK.
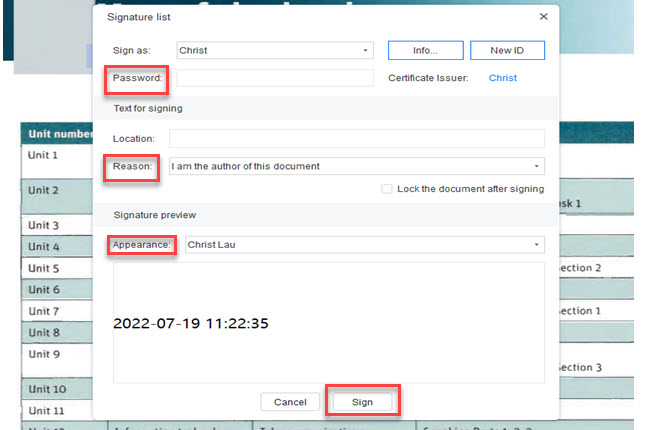
- Enter password and configure the appearance. Finally, hit the Sign button and the program will automatically save a timestamped document on your computer.
Foxit Reader
Next to our list of comprehensive solutions to add timestamp on PDF is the Foxit PDF Reader. It allows you to put a time stamp on your document for you to prove the specific time that you have created them. In addition, it enables you to sign with timestamps to ensure the authenticity of your digital signatures and confidential documents.
Here’s how to PDF timestamp using Foxit Reader
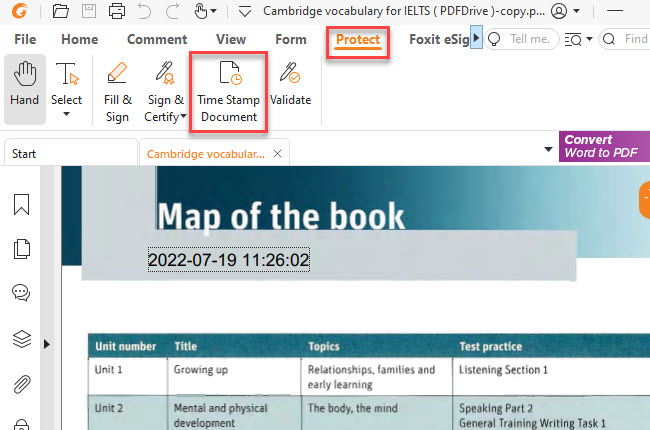
- Once installed, open a PDF document. Next, go to the Protect panel. Under its category, choose the Time Stamp Document menu and a pop-up window will appear on your screen.
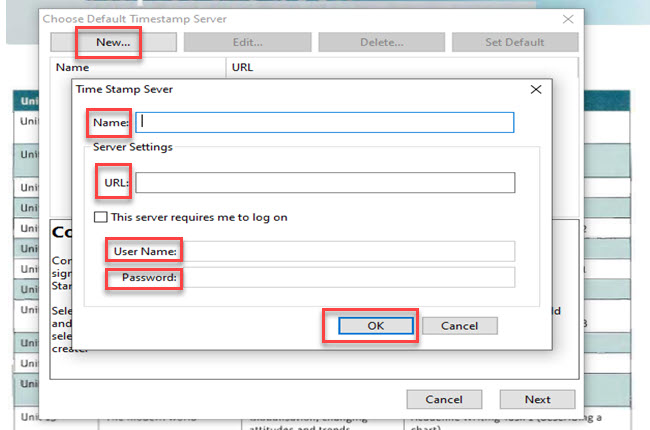
- Click the New button to configure your Time Stamp Server settings.
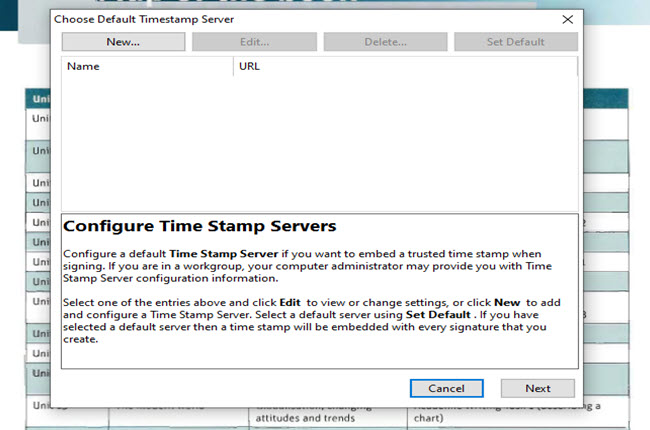
- You can also set your User Name and Password in this window. After this, click the OK button and save the PDF document directly on your device.
Adobe Acrobat
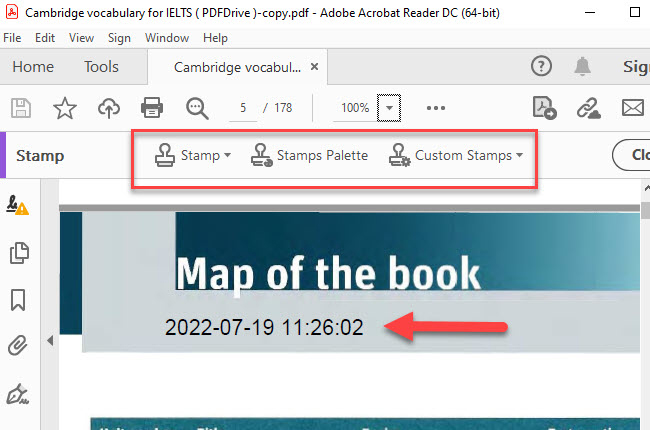
Adobe Acrobat is also a powerful tool for creating a timestamp on your PDF. The date and time on your computer when you sign the document can be used for the time stamp by default. You can use its Timestamp feature to include the time and date from an authoritative time source in a digitally signed document.
Conclusion
To sum it up, signing documents with a timestamp is a big help in managing and authenticating your PDF documents. If you already have a timestamp server provider, then Foxit Reader is for you. However, LightPDF Editor lets you create a new digital signature with a timestamp more efficiently among the solutions. So, take advantage of the benefits of these signature timestamping solutions now!


Leave a Comment